
Many
older Windows computer come with traditional mechanical hard drives,which are pretty
outdated and slow. Upgrading to a new SSD is the surest way to speed up an old computer.
In fact, moving your Windows OS can becomplicatly, especially since SSDs
are often smaller than their traditional hard drive counterparts.
However,
there is a way to migrate your Windows to an SSD without reinstalling. It takes
a few easy steps, and it will take a lot less time.
What
You Need
Apart
from your SSD, you’ll need a few other things for this process to work. Here’s
what we recommend:
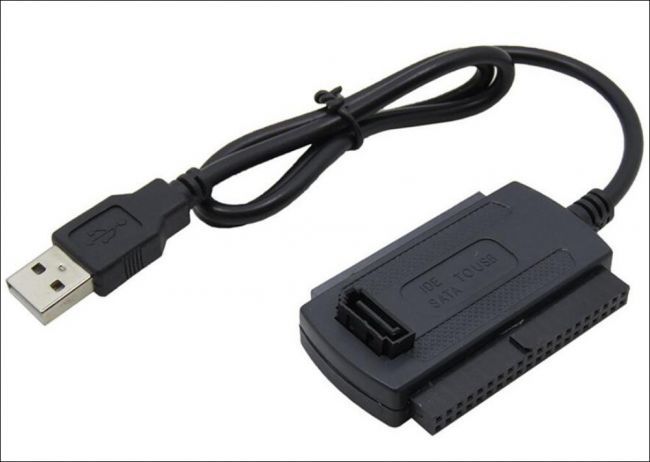
- A
way to connect your SSD to your computer. If you have a desktop
computer, then you can usually just install your new SSD alongside your
old hard drive in the same machine to clone it. If you’re using a laptop,
however, this usually isn’t possible, so you’ll need to buy something like
a SATA-to-USB cable (shown right), which will let you connect a
2.5″ hard drive or SDD to your laptop via USB. You can also install
your SSD in an external hard drive enclosure before you start
the migration process, though that’s a bit more time consuming.
- A
copy of MiniTool Partition Wizard. Its free
version has all the features we need to accomplish the task in front
of us, so download the free version and install it like you would any
other Windows program. Please note that make sure you click the
“Customize” links on the “Install Additional Software” page and uncheck
all the boxes—otherwise MiniTool will try to install
some bundled crapware along with its disk cloning tool.
- A
backup of your data.
We can’t stress this enough. It’s completely foolish to start messing
around with your hard drive without a backup. Check out our guide to backing up
your computer,
and make sure you have a full backup of your important data before
continuing.
- A
Windows system repair disc.
This is a just-in-case tool. On the off chance that your Master Boot
Record gets corrupted, you’ll be able to pop in the Windows repair disc
and fix it in a matter of minutes. Step One: Tidy Up Your Current Hard
Drive
If
you’re migrating to a drive that’s smaller than you’re current one—which is
often the case if you’re moving to an SSD—you’ll run into a problem right off
the bat. There isn’t enough room on your destination drive for all your files!
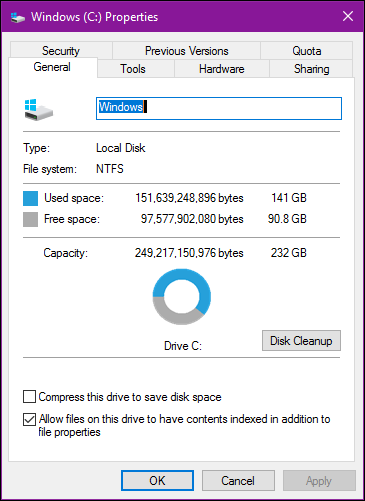
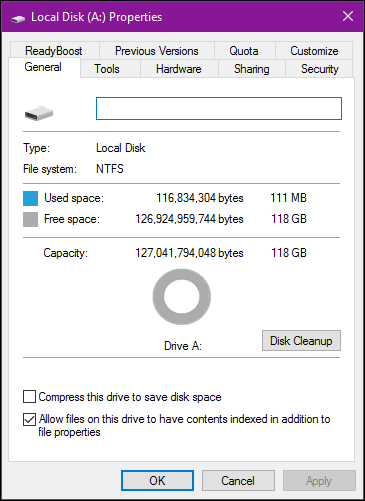
To
check the capacity of each drive, plug your SSD into your computer and wait for
it to show up in Windows Explorer. right-click on each drive and select
“Properties”. In the two screenshots below, you see our old drive’s (left) used
space (141 GB) is larger than what our new drive (right) can hold (118 GB).
You’ll
probably encounter something similar. So, before you migrate your data, you’ll
need to clean up your current hard drive.
Start
by deleting any files you don’t need. That means old movies, TV shows,
music, old backups, and anything else that
takes up a lot of space. Uninstall any programs you don’t use anymore,
then run Disk Cleanup to get rid of any other junk on your system.
That’ll
help a little, but in some cases, it may not be enough. If you run out of
things to delete, it means you’ll have to find a new place to store
personal files such as your pictures, documents, movies, music, and more,
because they won’t fit on your new drive.
You
have a couple of options:
- An
external hard drive:
If you have an external hard drive lying around (that you aren’t using for
important backups!), now’s the time to use it. You will need to move all
your precious files over to it in order to slim down your Windows
partition.
- A
second internal drive:
This usually isn’t an option available to a lot of laptop users, but if
you’re a desktop user, you could buy a large, cheap extra hard drive and
move your files to that.
- Cloud
storage:
If you don’t have any extra hard drives, you could move those extra files
to a cloud-based solution like Dropbox or OneDrive. Just keep in mind
that if you don’t have your personal files stored to the cloud yet, it
might take a while (like days or even weeks) to upload them, so just be
prepared. Once you’ve moved all your stuff over to your cloud folders, you
can unsync them to free up that drive space.
Remember,
since your new hard drive is smaller than your old one, you’ll need to find a
new permanent place to store them, so pick the solution that works best for you
long-term.
Step
Two: Update Your SSD’s Firmware
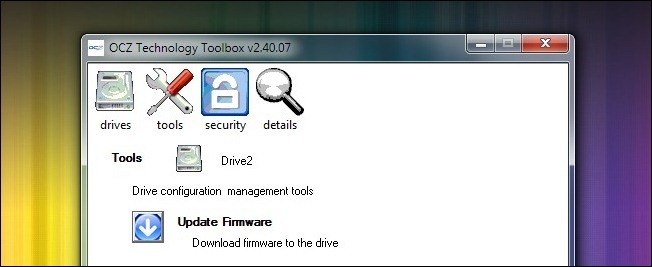
SSDs
are, technologically, the new kid on the block. Several of the earliest
generation SSDs had various bugs and issues which were only banished with
significant firmware updates. Each drive company has their own technique for
updating firmware—some require you to reboot with a special CD to flash the
firmware and some allow you to flash the firmware from within Windows if the
drive is not the primary OS drive. OCZ, for example, has one of the
aforementioned in-Windows tools (seen in the screenshot above). Visit the the
website of your drive manufacturer to read more about your drive and how to update
the firmware. Now is the absolute best time to update the firmware as there is
zero risk of data loss, since you haven’t copied anything to it yet.
Step
Three: Clone Your Drive With MiniTool Partition Wizard
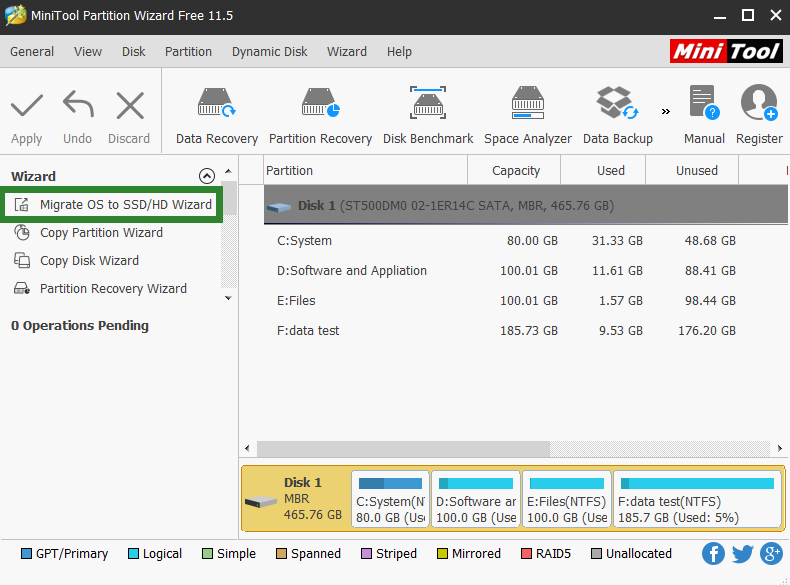
Now
it’s finally time for the main event. Fire up the MiniTool application and
click “Migrate OS to SSD/HD” on the main screen.
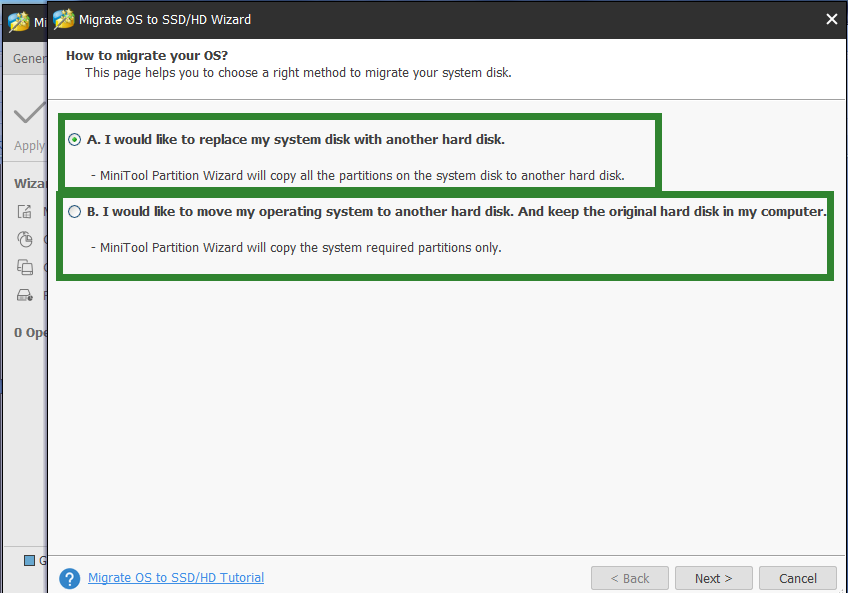
Select
a migration mode for Windows 10 transfer to SSD.
There
are two migration modes. you can accord to your need to migrate windows 10 to
SSD
If you would like to move the system disk
to SSD, choose the first mode. The function of this mode is the same as
"Copy Disk" feature of MiniTool partition wizard.
If you would like to only migrate Windows 10 to SSD
without reinstalling system,
the second mode is suitable for you. and it can copy only the system to your
SSD.
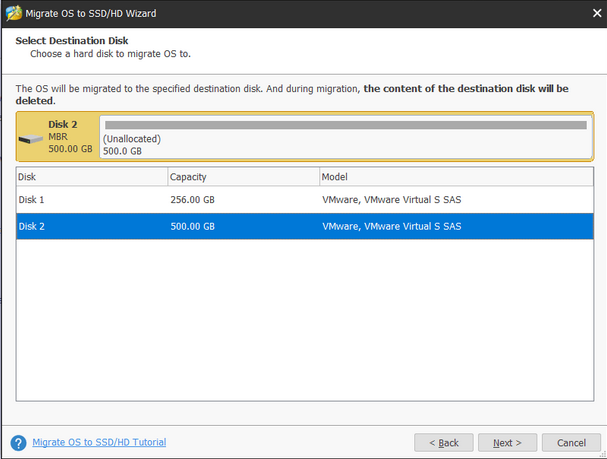
Select
your destination disk.
Select
to migrate Windows 10 to new SSD. please note that all the data of the
destination disk will be deleted during the migration. Thus, please make sure
the disk doesn't contain important files.
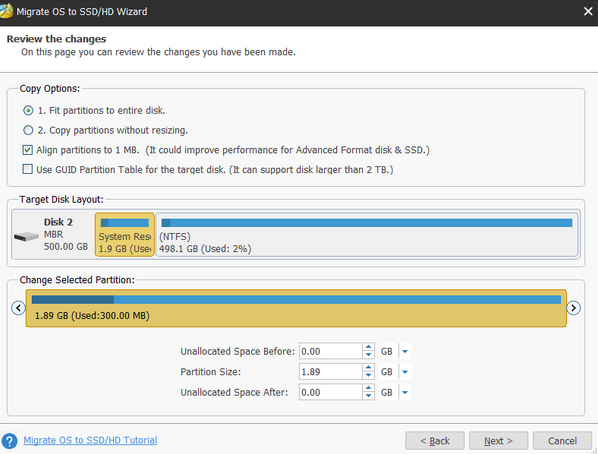
Review
the changes.
Choose
the copy mode, "Fit partitions to entire disk" or "Copy
partitions without resizing". Moreover, please check "Align
partitions to 1MB" for SSD. If you want to use GPT as the partition style
of your SSD, please check "Use GUID Partition Table for the target disk".
In the following figure, you can review all the changes you have made.
Execute
the OS migration by hitting the "Apply" button.
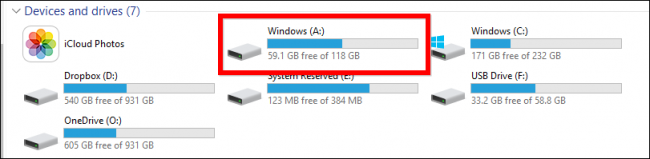
As
you can see in the following screenshot, our new system drive is already
showing up in File Explorer. All that’s left now is to begin using it.
To
do this, the next steps are fairly simple. Shut down your computer,
remove the old drive and install the new in the same place. Restart your
computer and it should boot from your new drive automatically.
If
you’re using a desktop computer and want to leave the old drive in
place—perhaps as a backup or storage device—then you will need to boot
into your system BIOS (usually by holding the Delete button before the Windows
boot logo appears). From there you will need to point your BIOS at the new
drive as the first one to boot.
In
either case, when you reboot, you should find that your SSD is now listed as
the C: drive. (If it isn’t, double-check you performed the above steps
correctly.)
Put
the Finishing Touches On Your SSD
Once
your new system drive is up and running, you’ll need to do a few last
things to make sure everything is running in tip-top shape. Here’s what we
recommend.
Make sure TRIM is turned on. TRIM is a
special set of commands that help SSDs effectively manage empty space on the
disk. Open up the command prompt and type in the following command:
fsutil
behavior query DisableDeleteNotify
This
lengthy command has a very simple output, either a 0 or a 1. If you get a 1,
TRIM is not enabled. If you get a 0, TRIM is enabled. If you need to enable it
type the following command:
fsutil behavior set DisableNotify 0
Make sure defragmentation is turned off. There is
no need to defragment an SSD, and in fact, it’s advisable not
to. Windows should handle this automatically, but it doesn’t hurt to check.
Open the Start menu and, in the run box, type dfrgui
to open the Disk Defragmenter. Click on the Schedule button, then click “Select
Disks” Uncheck your SSD (which should be your C: drive) and Click OK.
Restore your personal files. Here
you have some decisions to make. While it’s possible that your documents
and maybe even your pictures will fit onto your new SSD, it’s unlikely your
video and music files will, which means you’re going to need to keep them
located elsewhere, such as on a second internal drive (you can use your old
drive for this by the way) or an external hard drive.
If
you want, you can even point your special user folders to that new
location, so Windows will always look there first for the files in
question. Just right-click on your Documents, Music, or other user folders and
head to Properties > Location > Move… to move them.

A word on other SSD tweaks and tricks. Be cautious
about tweaking beyond these simple fixes. Many SSD guides suggest increasing
performance by turning off the Superfetch (there is dubious evidence that this
tweak improves performance at all) or disabling the page file (which decreases
writes to the SSD but can cause programs to crash if they run out of RAM).
These days, you shouldn’t have to do much to keep your SSD running optimally.
The
tweaks we’ve suggested here will definitely increase performance and with no
negative side effects. Proceed with caution deploying tweaks you find in other
guides and in discussion forum posts. And remember: Modern SSDs may have
limited writes, but they’re far less limited than the SSDs of old—so old advice
about avoiding things that write to your drive are pretty outdated. You’ll
probably replace your computer before you come even close to wearing out your
SSD!
Congratulations!
You’ve cloned your disk, saved yourself hours of reinstalling Windows and
customizing your apps, and you’re ready to enjoy a faster and quieter system
disk.
comments powered by Disqus
Our Partner and Affiliate
© 2010-2024 Copyright Reserved of PC Software Zone. All Other Brands or Related Material Found are Belong to its Respective Owner.