
Are you looking for a good way to record screen activities on your computer? For example, you may want to keep your gaming moments and save it as a video to share the project with others, or record some live streaming or online videos from live video sites, like CNN, BBC, etc. Anyway, you may have your own reasons for the screen recording. Actually, we can get it done easily with a professional screen recorder.
Today, I will show you the way to record any of the screen activity on your Windows PC with the FonePaw Screen Recorder software. It’s very easy to use and you can exactly dive right in it in no time. Before we start to capture and record screen with the recording tool, let’s get to know something about the FonePaw Screen Recorder. And I am sure you will like it!
What can you do with the FonePaw Screen Recorder?
FonePaw Screen Recorder is a helpful tool to capture your screen with audio on Computer. It supports Windows PC as well as Mac computer. Now, let’s see what you can do with this powerful recorder:
1. Capture gameplay with audio
2. Make lecture videos for the students or how-to training videos
3. Record video call with high audio and video quality
4. Record some live streaming or online videos
5. Export recording as GIF image
How to record your computer screen easily?
Tips: If you are going to record webcam videos on your computer, you should firstly check your Webcam camera and microphone and make sure they’re fine.
Now, follow the guide steps below to record your screen activities on computer.
Step 1: Download and install FonePaw Screen Recorder program on your computer and then launch it. On the homepage of the software, you can see there are different options including: video Recorder, Audio Recorder and Snapshot.

Step 2: Click on the feature you want. If you want to record the desktop of your computer, just click on the “Video Recorder”.
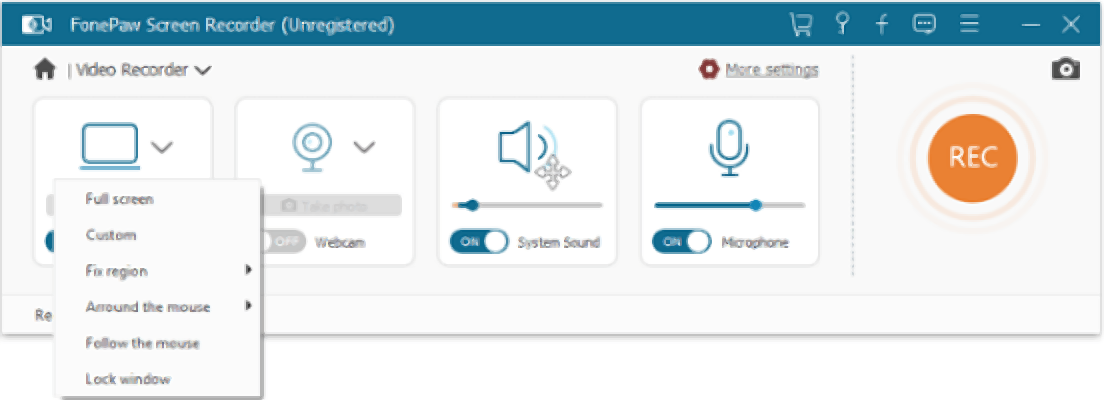
Then you can adjust the region to capture, the system sound, microphone and the output settings. By the way, you can also enable the webcam button to capture a webcam video.
Step 3: Click on the “REC” button on the interface to start recording. During the recording process, you can also take a note on the video, especially if you tend to add annotation to certain interface. Arrow, line, rectangle, text and more can be used to annotate. This feature satisfies the ones who want to create a tutorial video to show some skills.
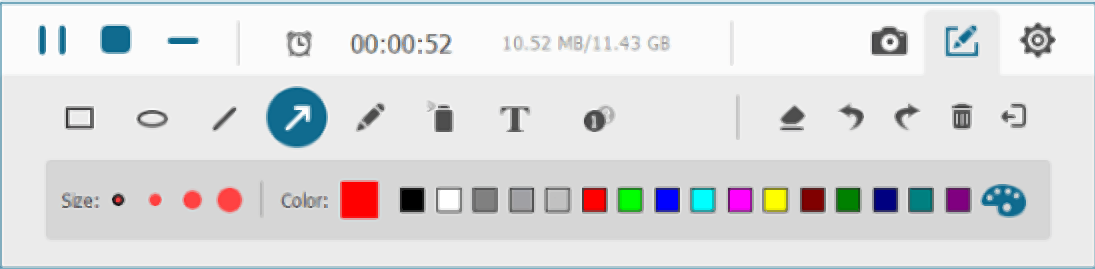
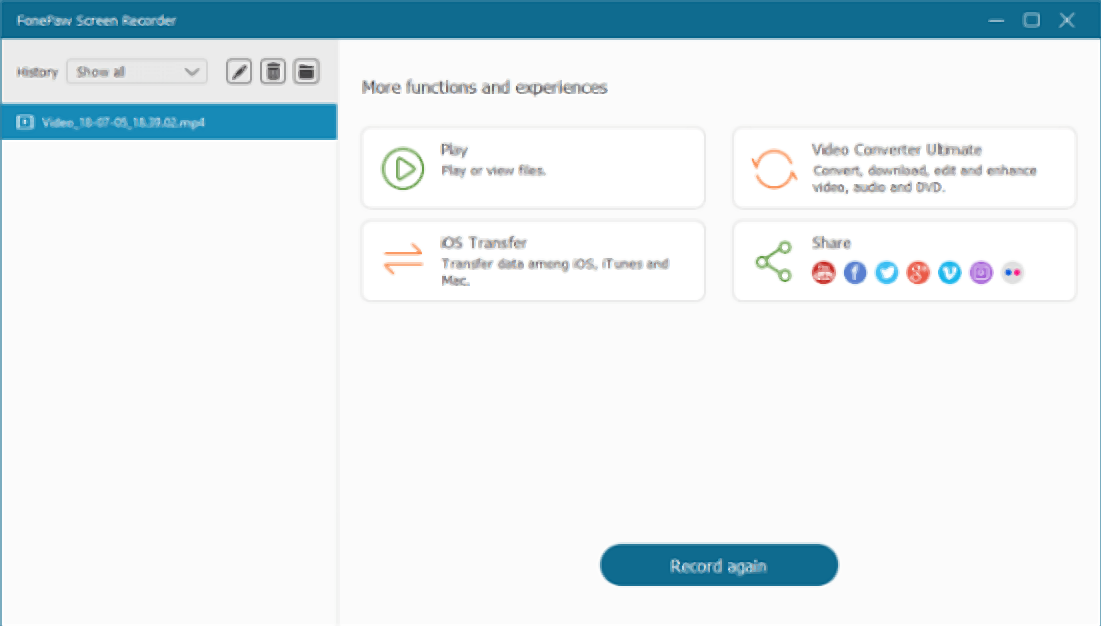
When you want to stop recording, just click on the square icon on the top left corner of the software. You can save it on your computer or share it to the social media such as YouTube, Facebook, Twitter and so on.
Above is the guide to use the FonePaw Screen Recorder Windows version. It’s a bit different for the Mac version but I think you can totally walk through it, as the steps to use the Mac version are as simple as the Windows one. So please share this terrific recording tool to your friends if you like it!
comments powered by Disqus
Our Partner and Affiliate
© 2010-2024 Copyright Reserved of PC Software Zone. All Other Brands or Related Material Found are Belong to its Respective Owner.